Two-tiered Vanilla Cherry Buttercream Birthday Cake Part III: Vanilla Buttercream & Assembly
A serial post about my many firsts for a birthday cake.
You've read about the first time I made Cherry Compote.
You've read about the first time I made Vanilla Cake.
Now on to the last and final component: Vanilla Buttercream frosting.
There is something about frosting that was like a horror story to me.
Don't get me wrong. I love it. There's something so lush, so smooth and if from a baker who cares, such a delicious addition to a dessert. As if that wasn't enough, it has got so much decorative capacity! It adds their beautiful little happiness to a dessert, and lifts it on to become a such a happy play on the tongue. I like to taste the frosting on my cupcake, and then taste it as part of a larger dessert.
But when it comes to making it, my knees knock together, and I don't even know why. I've made frosting before, a cream cheese frosting for a carrot cake. It was a disaster, and pushed down my confidence in making frosting even further down the pole. Homemade cream cheese, since we only get Cream cheese at EXORBITANT prices here in Delhi. Firstly, it tasted of chhana, or paneer. Mixed the sugar in, and beat it. And oh God, the entire frosting became as liquid as olive oil. So ultimately, my first attempt at making Cream Cheese frosting resulted in a sweet paneer soup. Nope. Didn't help my confidence!
For this particular request however, I needed a fail proof Buttercream Icing. I referred to what feels like a million blogs out of foodgawker, Pinterest and what not. I found the same 1-cup-butter-4-cups-sugar in it. FOUR cups of sugar, in ONE cup of butter? I could taste the grains of sugar just reading them. I may be wrong, because hey, the only time I made frosting it resulted in a disaster. But it felt..not quite what I was wanting. So I fell back on the one and only, Joy the Baker.
And did that pay off, or what.
Light, fluffy, mildly sweet buttercream with that touch of vanilla that seems to make life smile. Not to mention stable! In Delhi's heat, if a frosting made primarily out of butter can stay stable without any preservatives or additives, I'm sold!

So here it is. The very basic Vanilla Buttercream:
Vanilla Buttercream from Joy the Baker
(Makes enough to fill and frost a two-tier 8-inch cake not very thickly, and enough leftover to eat with a spoon for about two days)
You need:
The How:
The Assembly
What you need: A turntable if you have it, or the largest flattest plate you own, a board base (in case you're transporting this), an offset spatula.


That's it!
I really hope you enjoyed this three part series on my epic birthday cake making experience. Let me know if you have any issues with any part of this. Would love to help!
You need:
- 200 gms, that's two packs of Amul butter, bought to almost room temperature
- 1 cup of sugar
- A good bit of vanilla and vanilla sugar, if you have it
- 1 cup milk, cold
- 1/4 cup flour
- About 20-25 cherries, pitted and halved
The How:
- In a small saucepan, combine 1/4 cup milk with the flour and vanilla (and the vanilla sugar if you have it). Whisk till there are no lumps.
- Over medium heat, gently add the remaining milk and keep stirring to avoid lumps, till it comes to a boil.
- Reduce heat to low and continue mixing. The mix will begin to thicken. It's a pretty fast process.
- When it starts to get thick, take it off immediately.
- Allow the mix to cool in room temperature. You can place it in the fridge or a cold water bath. Take care to not let a skin form on top. Have someone stir it once in a while.
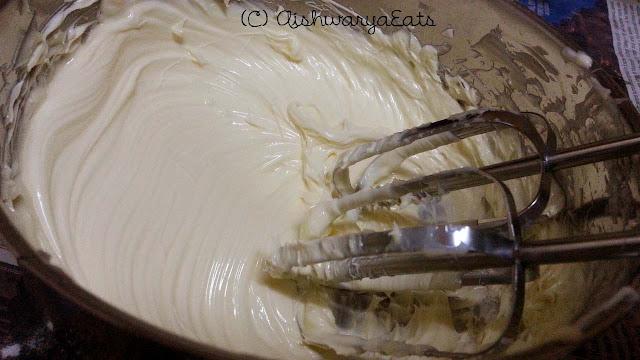
- While it cools, beat the butter with a mixer at medium speed, 3-5 minutes.
- Add the sugar, and beat away happily about 5-7 minutes. Be sure to scrape the sides often.
- With the mixer on low, pour in the milk mix and continue to beat till light and fluffy.
- Feel free to taste it as much as you can!
- Place it in the fridge when you're done, and you're still waiting for the cake to cool.
The Assembly
What you need: A turntable if you have it, or the largest flattest plate you own, a board base (in case you're transporting this), an offset spatula.
- If you have a turntable, you're blessed. I did not, so I took the flattest, largest plate I had, placing the board base on it.
- Turn out the COMPLETELY cool cakes in two separate plates. Ignore mom's warning to stop occupying half the kitchen's utensils.
- If you want, you can trim the tops of the cakes to make them perfectly flat on both ends. We'll do something about those extra bits of the cake, don't worry! ;)
- Place the slightly larger, or not so good looking cake on the board base. Spread a light layer of frosting on top. Seal in all the crumbs. And DO NOT wipe your crumby spatula in your bowl of frosting.
- Spread out fresh pitted cherries on the layer of frosting. Layer another light layer of frosting on it.
- Place the second layer of cake on this.
- Now just like the first cake top, crumb coat the entire side of this double layer. Put a dollop of it, and push it till the side gets coated very lightly, sealing in all the crumbs. Turn the plate around to get to the sides.
- Similarly, coat the top of the cake very well.

This is what my crumb-coated cake looked like
- Coat the cake, sides and top once more with frosting, this time smoothening it out as much as you can, because this is the exterior of your prized cake.
- Now you need your piping bag. You can use a taped together piece of parchment paper, rolled into a fool's cap shape, with a opening at the tip. You can also use proper piping bags and tips. I had neither, so I used a tiny ziploc pouch and cut a tiny hole in one corner.
- Fill this with the frosting, and make a boundary wall around the top edge of the cake, around the top. we're doing this to essentially hold on to the compote. You would not do this, if you want your compote to drip down the sides artistically. Pipe about three lines on the edge.
- Spoon the cold compote into this area. Don't pour it, it may get out of hand.
- What I did next was to decorate it. I piped zigzags on the top edge, and squeezed out pearls of frosting on the base edge.

- This is essentially the cake in it's original form. If you want, complete this with chocolate sticks, chocolate accents (liquid chocolate piped out onto a baking sheet in your choice of design then frozen and taken off).
- Chuck it into the fridge till about an hour before you need to pack it and deliver it.
That's it!
I really hope you enjoyed this three part series on my epic birthday cake making experience. Let me know if you have any issues with any part of this. Would love to help!


You inspire me to cook..to bake ..You are the reason I find my peace in baking.. Ur blogs make me salivate and inspire me to innovate.. Congratulations on being such a reputed food writer and food critic..Cheers to you Girl :D
ReplyDeleteThank you so much Deesnitch! :)
Delete